
Often, when we hear the word “Homelab,” the image that comes to mind is a noisy server rack, skyrocketing electricity bills, or a stack of used hardware (Mini PCs/Thin Clients) that must be purchased specifically for tinkering.
In reality, to learn System Administration, DevOps, or simply to explore Linux, you don’t need to spend a single penny on additional hardware. The answer to building a solid homelab is right in front of you: the Windows PC or Laptop you are currently using.
The key is Type 2 Virtualization using VMware Workstation.
Why You Don’t Need to Buy a Physical Server
Modern computers are often “overkill.” If your PC has an i5/Ryzen 5 processor or better and at least 16GB of RAM, you possess resources that go to waste if used solely for browsing or typing documents.
Instead of buying a used PC for IDR 1-2 million to serve as a server, you can “borrow” some of your main PC’s power to run other operating systems virtually.
The Advantages:
- Zero Cost: No need to buy new hardware. Especially since RAM and Storage (SSD) prices have been skyrocketing recently, utilizing existing hardware is the smartest financial move.
- Save Electricity: No additional devices sucking power 24/7.
- Flexibility: Turn on the VM when you want to learn, turn it off when you want to game or do heavy work.
Why VMware Workstation? (Vs. Competitors)
You might ask, “Why VMware Workstation? Why not the free VirtualBox or the popular Proxmox?”
Here are the technical reasons why VMware Workstation Pro (especially version 17 and up) is the king of “Single PC Homelabs”:
1. VMware Workstation vs. VirtualBox
VirtualBox is open-source, but it often feels “less polished” compared to VMware.
- Stability & Performance: VMware handles CPU and RAM allocation more efficiently. VMs in VMware feel much “snappier” and responsive compared to VirtualBox.
- GPU Support: If you want to run a VM that needs a bit of graphics acceleration (e.g., trying a Linux GUI), VMware is much smoother.
2. VMware Workstation vs. Proxmox
Proxmox is the current gold standard for homelabs, BUT Proxmox is a Type 1 Hypervisor (Bare Metal).
- The Problem: To install Proxmox, you must wipe your Windows installation. That PC becomes dedicated solely to being a server. You can no longer use it to play games or edit videos natively.
- The Solution: VMware Workstation is a Type 2 Hypervisor. It runs on top of Windows. You can have a Linux server running in the background while staying productive on Windows.
3. The Bonus: Gateway to the Enterprise World (vSphere)
This is a reason often overlooked by beginners. VMware isn’t just a desktop app; they rule the Data Center world. Large enterprises use VMware vSphere (ESXi).
By learning VMware Workstation, you are actually learning a “mini version” of vSphere. The concepts of networking, disk management, and snapshots you learn here are directly transferable to a professional environment. Workstation can even connect directly to corporate vSphere servers.
The Best News: VMware Workstation Pro is Now FREE
Previously, the main reason people chose VirtualBox was that VMware Workstation Pro was expensive. However, Broadcom recently changed its licensing policy.
VMware Workstation Pro 17 is now completely FREE for Personal Use.
This means you get enterprise-class features, like snapshots (to backup VM states), cloning, and advanced network management at no cost.
Case Study: My aaPanel Setup
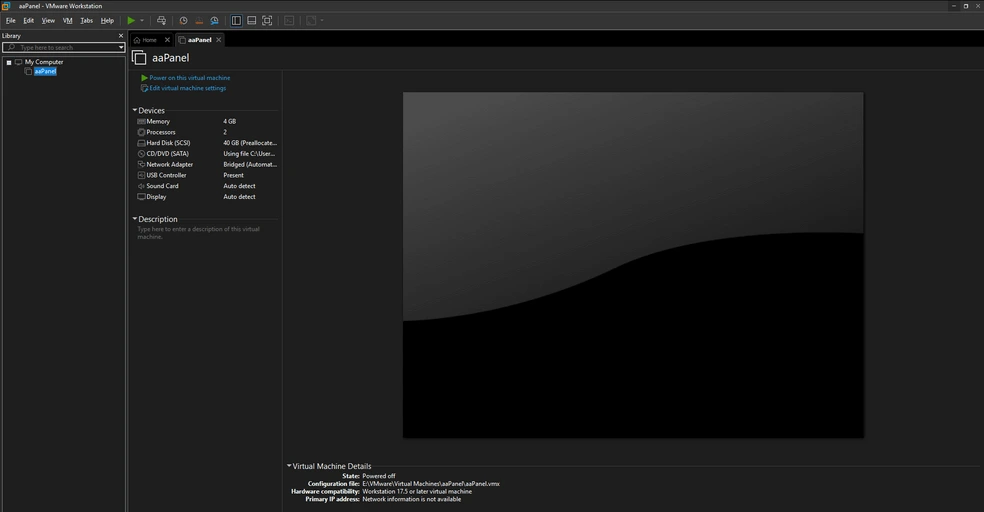
As a real-world example, take a look at the screenshot above. That is the VMware Workstation interface on my PC.
You can see I have a VM named “aaPanel” ready to go. This is a perfect example of efficiency. Instead of renting a monthly VPS just to learn about web hosting control panels, here is my exact workflow:
- OS Installation: I installed Debian 12 on VMware.
- Control Panel: I installed aaPanel inside it to manage websites easily.
- Networking: I set the network adapter to Bridged mode. I then assigned a static IP to this VM via my router (DHCP Reservation) so the local address never changes.
- Public Access: To access the websites hosted on this VM from outside, I configured Cloudflare Tunnel. This allows me to expose only the specific websites to the public internet securely, while keeping the actual VM and administrative access (like SSH) strictly local. This eliminates the need for a Public Static IP or opening dangerous ports on my router.
The result? I have a secure, publicly accessible staging environment running right on my PC.
So, When Should You Buy a Physical Server?
Even though VMware Workstation on a main PC is powerful, there comes a point where you need to “level up” to a dedicated physical server. Here are the signs:
- 24/7 Uptime Requirements: If you want to run a DNS Server (Pi-Hole) or Home Assistant that must never go down, your main Gaming PC draws too much power (100W+) compared to a dedicated Mini PC server (15W).
- “Lab” Becomes “Production”: When your personal PC activities (Windows updates/restarts, game crashes) start interrupting the server services you are running.
- Out of Resources: When your main PC’s RAM is no longer sufficient to handle the increasing load of your VMs.
- Hardware Passthrough: If you need to build a NAS with multiple physical hard drives or need strict GPU passthrough.
Conclusion
Homelabbing is about software and skills, not about how much hardware you stack on your desk. By utilizing your existing Windows PC and the power of VMware Workstation Pro, you can build complex IT infrastructure, learn Linux, Docker, and prepare for vSphere certifications without spending extra money.
Start with what you have. Download your favorite Linux ISO, create a new VM like the one in my example, and welcome to the world of Homelab!